Hey everyone, it’s Mia here from Resin Keychains Co. – quick heads up, I get so many DMs and emails lately asking how we attach beads to our resin keychains, and since I’m the one who’s spent way too many late nights hunched over a worktable (surrounded by sticky resin fumes and half-finished projects), I figured I’d spill all the not-too-secret tea. This is the exact method our team uses to make those cute, durable keychains you’ve probably seen online, and it’s way simpler than it sounds – no fancy tools or expensive stuff required. Let’s dive in. Resin Keychains
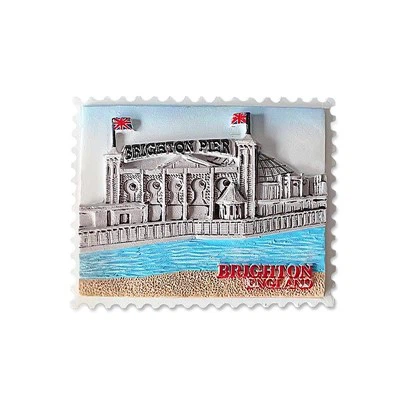
First off, let’s cut to the chase: why does bead attachment matter? If you skip a step or use the wrong glue, those beads will fall off after a week of tossing your keys in your bag, and nobody wants that. Our keychains are made for daily use, so the attachment has to be strong enough to handle being jostled, tugged, and dropped. I’ve tested so many wrong glues over the years – basic hot glue melts when you leave your keychain in a hot car, regular craft glue gets gummy and peels, even super glue can crack resin if you get it too wet. The method we landed on works every time, and it’s easy enough for beginners to try at home, too – though if you’re looking to bulk order pre-made keychains with beads, hit us up later, yeah?
Let’s start with the supplies you’ll need, because I know you don’t want to run to the store three times mid-project. We use stuff most people already have or can grab at a local craft store: first, resin keychains (obviously – if you’re making your own, make sure they’re fully cured, no sticky spots! I learned that the hard way once, a bead fell right through a half-cured keychain mid-attachment). Then, beads – any kind works, but we prefer ones with a hole that’s at least 1mm wide (tiny seed beads are a pain because the string or cord won’t fit, so save those for jewelry). You’ll need a jump ring – 6mm is our go-to size, it’s not too big or bulky, and it fits through the keychain’s split ring hole easily. A beading cord, usually nylon or cotton, we like 0.5mm thickness because it’s flexible but doesn’t fray. The big one: a strong, flexible adhesive. We use E6000 for most projects, it’s waterproof, stays flexible, and doesn’t crack when it’s cold or hot. If you don’t have E6000, a good jewelry-grade super glue will work too, just make sure it’s not the kind that dries rock-hard. Last, a few basic tools: small scissors, a toothpick or a tiny paintbrush for applying glue, a paper towel (resin and glue are messy, trust me), and some rubbing alcohol to clean the keychain and beads before sticking anything.
Wait, quick prep step that’s non-negotiable: cleaning. I can’t stress this enough. If there’s resin dust, lotion, or finger oil on the keychain, or dirt inside the bead hole, the glue won’t stick. I always wipe the back of the keychain where I’m attaching the bead with rubbing alcohol on a cotton pad, then blow off any leftover dust. For beads, I stick them in a small bowl of rubbing alcohol, swish them around, then lay them on a paper towel to dry. Skipping this step is why 90% of beginner bead projects fail – I’ve made that mistake more times than I want to admit, so take 2 minutes to clean, it saves you from redoing a whole keychain.
Now, let’s get to the actual attachment steps, broken down simple, no jargon. First, decide where you want the bead on the keychain. Our keychains usually have a pre-drilled tiny hole (or sometimes we just use a spot on the surface if it’s flat), so mark that spot with a pencil light – you don’t want it to be messy. Next, take your jump ring: open it gently by twisting it sideways, not pulling it apart (pulling makes it bend out of shape and hard to close). Thread the jump ring through the bead hole, right? Wait, hold on – if your bead has a big enough hole, you can skip the jump ring and use the cord, but jump rings are better because they let you remove the bead if you want to change it later. For our bulk keychains, we mix both: some have beads attached with jump rings for versatility, some have them glued directly on the surface for a sleeker look. Let’s cover both, starting with the jump ring method because it’s our most popular.
Once the jump ring is through the bead, you can thread the other end through the keychain’s hole – if there isn’t a pre-drilled hole, that’s where the toothpick and glue come in. Apply a tiny dot of E6000 glue on the spot where you want the bead, press the bead (with the jump ring through it) onto the glue, hold it for 10 seconds to make sure it sticks, then wipe off any excess glue with a damp paper towel right away – it dries clear but hard to scrape off once it’s set. If you’re using a keychain without a pre-drilled hole, make sure the glue is fully dry before putting it on your keys – usually 24 hours for E6000, that’s another lesson I learned: I put a keychain with a new bead on my keys after 12 hours, and the bead fell off within 10 minutes. Patience is key here.
If you want to glue the bead directly onto the surface of the resin keychain (no jump ring), that’s even simpler. Just apply a small amount of glue to the back of the bead, press it firmly onto the clean spot on the keychain, hold for 15 seconds, wipe excess glue, and let it cure fully. This method is great for flat resin keychains like circles or rectangles, and it makes the bead feel super secure – perfect for kids’ keychains since you don’t have to worry about the jump ring snagging on bags.
Wait, a pro tip from our team that’s game-changing: if you’re using multiple beads, space them out before gluing. Lay all the beads on the keychain where you want them, take a photo with your phone, then glue them one by one. That way you don’t accidentally glue a bead in the wrong spot and have to scrape it off (which can take a layer of resin with it, no fun). Also, for beads with larger holes, you can use a little beading cord to tie them instead of glue – thread the cord through the bead, tie a knot, then glue the knot to the keychain. That’s a good trick for extra heavy beads, like glass or wooden ones.
Now, let’s talk about common mistakes we see people make all the time. First, using too much glue. You don’t need a glob – that just oozes out everywhere, is messy, and takes forever to dry. A tiny dot is all you need. Second, not letting it cure fully. I know, I’m repeating that, but it’s the number one mistake. E6000 cures in 24 hours, even if it feels dry to the touch. Third, using low-quality beads. Cheap beads have rough edges, and their holes might be uneven, so the glue won’t stick as well. We use high-quality acrylic, glass, and wooden beads for our bulk keychains, so they last way longer than the ones from the dollar store. Fourth, forgetting to test the bead on the keychain first. Some beads are too big, or the color clashes, so it’s better to check before you glue it on for good.
If you’re reading this and thinking, “Ugh, this sounds like too much work, I just want custom resin keychains with beads for my business or event,” that’s exactly what we do! We supply bulk resin keychains to small businesses, event planners, and even folks who want to make custom swag for their teams. We handle all the bead attachment with that exact method I walked you through, so you get durable, cute keychains that don’t fall apart. We can match your brand colors, use specific beads you pick out, or even add custom charms along with the beads – just shoot us a message to chat about your order, no obligation.
Wait, one last quick hack: if you ever have a bead fall off one of your keychains, don’t throw it away! Grab a tiny dot of E6000, clean both the bead and the keychain spot, press them together, hold for 10 seconds, and let it cure. I’ve fixed dozens of our own keychains this way over the years, it works like a charm.
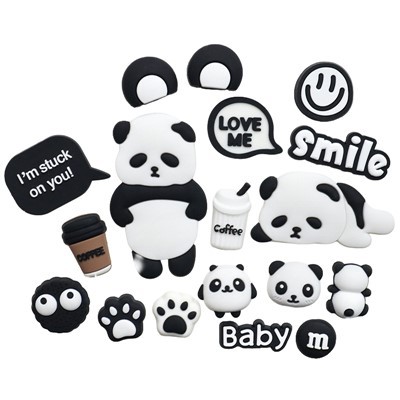
At the end of the day, attaching beads to resin keychains is all about taking the time to prep, use the right supplies, and not rush the curing process. It’s not rocket science, but a little care goes a long way in making something that lasts. If you tried this method at home and it worked, or if you have your own trick, drop a comment below – I love hearing from fellow resin lovers. And if you’re looking to order bulk keychains with perfectly attached beads, feel free to reach out and let’s talk details.
Resin Ornament References
- E6000 Adhesive Technical Data Sheet, Industrial Formulators Division, 2023
- "DIY Resin Keychains: Best Practices for Attachment," Resin Crafts Magazine, Vol. 12, No. 4, 2022, pp. 45-47
- Bead Attachment Guidelines for Jewelry and Keychains, Craft and Hobby Association, 2021
Shengzhou Shengteng Accessories Co., Ltd.
With abundant experience, we are one of the most professional resin keychains manufacturers and suppliers in China. We warmly welcome you to wholesale customized resin keychains at competitive price from our factory. For free sample, contact us now.
Address: Room 701, Building 23, Wanyang Innovation City, No. 368 Kaiya Road, Changle Town, Shengzhou City, Shaoxing City, Zhejiang Province
E-mail: 15869252296@163.com
WebSite: https://www.shengtengjewelry.com/
